
ar-big
The “Handy” Category.
After you have the “big” tools, which maybe I should call the essentials, most of the remaining tools you’ll want to have available are in the handy category. These things make some jobs, and life along with it, easier. Some are indispensable.
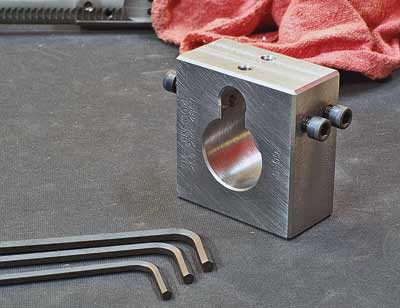
One I use often is a bolt disassembly fixture. Some springs on the AR-15 are stout — and small. It’s difficult to keep them depressed for installation and removal without an extra appendage, and that’s what this item provides. The bolt disassembly fixture compresses the ejector. Without it you’re trying to keep a tiny part compressed while still trying to complete the assembly.
A 3/8″ dowel will fit into the bolt face and compress the ejector, but it’s awkward to manipulate the retaining pin while trying to keep the dowel in place and the ejector under pressure. It can be done, but the actions are graceless. Speaking of wooden dowels, a couple small squares of soft wood are indispensable. Use these to back up parts for pin installations.
Masking tape should be a part of many projects. I use this to protect the receiver finish. The wisdom of its use is kind of like its original intent. Taking the time to prepare the surfaces prior to painting (or driving roll pins) pays off the first time there’s an “oops.” It happens in a heartbeat. I also use a strip of the wider variety to hold small parts in place while they’re waiting on installation. I learned this years ago working on motorcycles. It’s also a help to maintain the assembly order. And should you forget the masking tape, keep a flat black paint marker on hand to touch up the shiny spots — it can make you feel all professional-like after pin installations.
I think it’s important to polish the chamber on any AR-15. This is most easily done using a specialty tool and I like the Flex-Hone. This tool, and some cutting oil, helps ensure spent cartridge cases eject with minimum damage — and yes, it’s during extraction the polished chamber helps the most, not in case feeding.
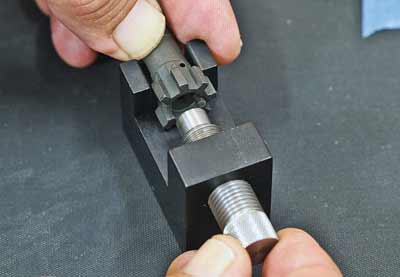
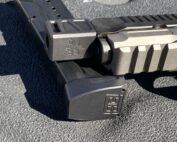
This is a bolt disassembly tool from Sinclair. There’s even a
hole there to let the pin fall though. Good details.
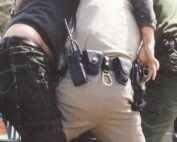
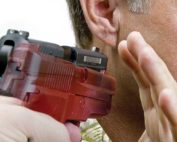
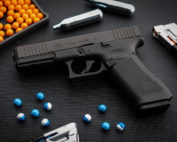
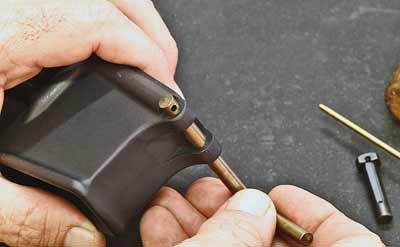
Extra handy for an important operation, this tool compresses the magazine
latch button so the latch can be wound to the correct orientation.
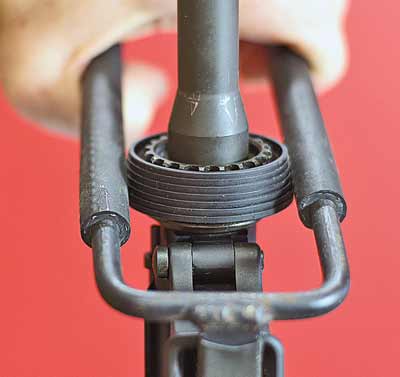
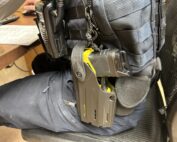
This godsend is a handguard removal tool. The tab goes into the mag well,
the padded arms clamp around the ring and then lever it down.
Flying Springs
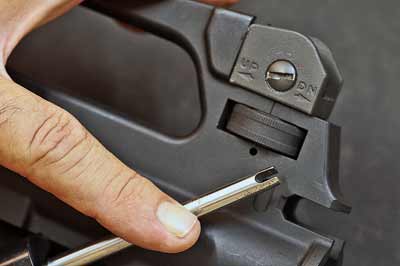
Two more assembly tools come to mind, which become pretty much mandatory after one use. It’s really necessary to have a front takedown pin detent installer. It’s simply round stock with a hole in it. You put the tool through the front hole in the lower, align its hole with that in the receiver, insert the detent spring and detent and then compress these pieces using a capture punch. Rotate the tool as you remove the punch and the tool will keep them captured. Carefully press out the tool using the front takedown pin as its replacement and the detent will engage its slot in the pin. Dandy.
Of course, even this isn’t certain. The detent is prone to careening wildly about. Another valuable assembly tool for this operation is a plastic baggie to fit over the works in case the detent decides to launch. Otherwise, you’ll be sweeping and searching with a flashlight. I call it the “gunsmith prayer stance” — hands and knees on the floor. It’s amazing just how far these tiny springs can propel an item.
The installation of the magazine catch assembly can be a terror sometimes. To finish this job it’s necessary to compress the latch button fully inward so the latch mechanism can be wound down on its threads and establish the correct engagement. There is a phenolic tool exactly fitting the button recess, and the tool has enough height the receiver can be flipped over and the plunger on the tool can be pressed against the bench top. This job then becomes very easy.
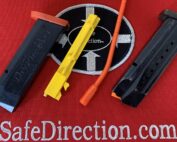
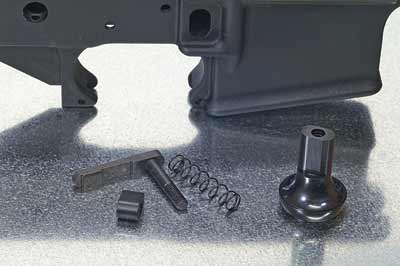
This tool does a job no two people can manage without. It’s a — are you ready —“front
takedown pin detent installation tool.” It holds the spring and detent in place
while the takedown pin is inserted.
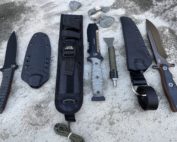
MOACKS’ carrier key staking tool fits all the different screws and does a consistent
job. You can’t make a mistake with this tool. It works as a fixture.
Here’s a simple rear sight spring tool. Use this to compress and hold the
spring while the roll pin is installed across its substantial gap.
3rd Hand
Here’s one that’s genius. It’s a little more than a casual investment, but if you work on AR’s with conventional plastic handguards, you know that removal and installation is another 3-handed job. It can be a bear to keep the Delta Ring pulled down so each piece of the handguard can be removed, and it gets harder and harder with each failed attempt. A “handguard removal tool” uses a gripping surface and leverage to compress the Delta Ring fully, and it’s easy to hold it fully compressed. The first time I used this I cried an audible “thanks” to whoever invented it.
A rear sight spring tool is another must-have if you work on conventional (carry handle) uppers. The big spring covering the sight post is a bear. Without some sort of tool, it’s not possible to install the roll pin. You have to keep the spring compressed above the level of the receiver pin holes so the pin can clear the bottom of the spring and enter the opposite side hole without getting bent, ruining it. I dread this job.
Specialty tools range from the simple to the complex. Simple looks like a screwdriver with a U-shaped opening allowing the pin to pass. Complex is a threaded plunger compressing the spring, holding it easily in place. A simple tool can also be made from a dowel with a hole drilled through it at an appropriate height, but you can guess there are levels of “works well.” Grease, believe it or not, is an assembly tool — the thicker the better. Use it to retain springs and detents on rear sight assemblies, for instance. My choice is Plasti-Lube, the staple for M14/M1A lubrication. GI-issue grease (Grease, Rifle) works second best.
Of all the specialty tools there’s one that might not get much use, but when it’s needed there is no substitute — a carrier key staking tool. It’s possible to effectively retain the screw heads after a sharp rap to a punch with a well-placed tip, but it’s also just as easy to get a really horrible looking job. If you always say, “I don’t care how it looks as long as it works” you may not need a specialty tool. Otherwise, just for the satisfaction of knowing the job was done effectively, it’s a good investment. There are different levels of performance and correspondingly different costs. And, yes, the carrier keys should always be staked. Torque and glue aren’t adequate. I’ve seen quite a few carriers without staked key screws, and that, in my opinion, is a half-done job. They also loosen, and when they do, malfunctions ensue.
This short article is a specially adapted excerpt from The Competitive AR-15: Builders Guide, a book by Glen Zediker and Zediker Publishing. Check out www.zedikerpublishing.com or call (662) 473-6107. For more info: www.americancop.com/index/
By Glen Zediker
Order Your Printed Copy Of The American COP May 2014 Issue Today!
Download A PDF Of The American COP May 2014 Issue Now!